2.26.2012

Bananas and a Sunday Afternoon


I love, love, love Ina Garten's desserts.  Something about them - the comfort factor is way up there, the choice of ingredients are typically stocked in our house and there is an easability to substituting ingredients and the darn thing still comes out fabulous!  "How Easy is That?" is the Barefoot Contessa's cookbook that stresses simplicity but delivers on taste and the wow factor.  First off, good ingredients, and secondly, can't beat a woman who successfully ran a bakery for many years!

Today I found three overripe bananas in my kitchen that were screaming to be made into a cake.  Ina came to mind.  Go figure.  Her Old Fashioned Banana Cake with Cream Cheese Frosting looks heavenly - even though I'm not a fan of cream cheese icing, but the other two-legged members of my family are...I'm sensing I'm going to be a hit today.  Thanks Ina!


Old Fashioned Banana Cake with Cream Cheese FrostingBarefoot Contessa- How Easy is That cookbook

print recipe

Ingredients
3 very ripe bananas, mashed
3/4 cup granulated sugar
1/2 cup light brown sugar, lightly packed
1/2 cup vegetable oil
2 extra-large eggs, at room temperature
1/2 cup sour cream (I used low fat)
1 teaspoon vanilla extract
2 cups all-purpose flour, after sifting
1 teaspoon baking soda
1/2 teaspoon kosher salt
1/2 cup coarsely chopped walnuts (optional)
Cream cheese frosting ( optional,recipe follows)
Walnut halves, for decorating
Tip: If you are not fussy for icing, I'd simply sift some icing sugar on top with a few walnut halves.  You can serve warm with a dollop of vanilla cream or even ice cream.
PREHEAT oven to 350 degrees. Grease and flour a 9 x 2-inch round cake pan, or line the pan with a piece of parchment or wax paper cut to fit inside the cake pan.  Spray the liner and sides lightly with cooking spray. 
MIX bananas, granulated sugar and brown sugar in bowl with an electric mixer on low speed until combined. Add oil, eggs, sour cream and vanilla. Mix until smooth. Add flour, baking soda and salt. With mixer on low,  mix just until combined. Stir in chopped walnuts if using. Pour batter into the prepared pan and bake for 40-45 minutes, until a toothpick inserted in the center comes out clean. Cool in pan for 5 minutes, turn out onto cooling rack.

Serve warm, sprinkled with powdered sugar, or cool completely and top with Cream Cheese Frosting. 
Cream Cheese Frosting
6 ounces cream cheese, at room temperature
6 tablespoons unsalted butter, at room temperature
1 teaspoon pure vanilla extract
2 1/2 cups sifted confectioners’ sugar (1/2 pound)
MIX cream cheese, butter and vanilla in the bowl of an electric mixer fitted with paddle attachment on low speed until just combined. Don’t whip. Add sugar and mix until smooth.

Enjoy!

Sangrita


Back from Mexico about three weeks ago and just too darn busy with family, life, work, dog, et al until now to get back blogging!  What a fantastic trip!  Officially known as Hubby's retirement bash, we spent two and a half weeks in Cabo in our new Villa with friends and family.  Perfect.  And come Wednesday, we will be back there again!  No rest for the wicked, is there?

I found some great new places, a quirky cooking school and some new favorite foods.  But for now, I think I'll start my blogging with Hubby's favorite Mexican drink: tequila banderas, or banderita.  This is one shot of a moderately good drinking tequila (we use reposado) with a shot of lime juice and a shot of a chaser, called Sangrita.  There you have it: three shot glasses filled with the colors of the Mexican flag (bandera).  Very patriotic, very Mexican and full of flavor from start to finish.


Let's start with a quick Tequila 101.  There is the Jose Cuervo line, perfect for campus or those looking for a good time and cheap time.  Then there are three levels of tequila: Blanco, Reposado and Anejo that are distinguished primarily on the length of aging, similar to a scotch or other fine liquor. Blanco is a good, light tequila that is often used in high end cocktails (think PATRON Blanco Tequila).  I believe it is roughly aged a few months and like the word "blanco", is very light in color.  The next level is reposado, aged slightly longer, about a year, and slightly darker in color.  This is a great sipping tequila.  Smooth and not too expensive, a reposado is often considered in Mexico to be a "lady's tequila" (think HERRADURA Reposado Tequila).  And last but not least, there is tequila Anejo.  Anejo means aged, and with that, this tequila is typically aged anywhere from one to three years.  It's generally considered the top shelf of tequila, used for sipping the same way you'd enjoy a single malt scotch and can vary in color from pale to a deep and beautiful amber color.

Once you chose your tequila, on to a freshly squeezed ounce of lime juice and then, the Sangrita....


Sangrita was difficult for me to wrap my head around.  First off, I don't and I won't drink tomato juice.  No issue with the tomato itself, but the thought of a cold glass of tomato juice just doesn't do it for me.  So, a drink that is predominantly tomato is well...unappealing.  That said, Sangrita is more than just V8.  It's a complex drink that includes vegetables, fruits, spice, sugar and a real savory finish.  I found several recipes online for Sangrita - most fairly labor intensive with fine dicing involved. David loves it, so after spying on the bartenders mix this flavorful concoction together, I headed back to the lab to hammer out my own recipe:

Sangrita Gringa

Ingredients

1 1/2 cups V8 Juice (I use the low sodium with mixed vegetables)
1 1/4 cup Orange Juice
1 Tbsp. and 1 tsp. Grenadine
3/4 tsp. Tabasco Sauce
3 tsp. HP Sauce
3/4 tsp. Worchestershire Sauce

Directions

Whisk all ingredients together until smooth.  Store in a glass bottle in the fridge, serve cold.

How easy is that? :-)

If you need help, start with sipping the tequila, then lime and finish it off with a sip of sangrita.  Repeat until you need another...

Saludos!

1.15.2012

Gone South...


Gone to Mexico - see you in February!!


12.29.2011

Happy Holidays!


Obviously, this is the year of being s-l-o-w, for me, anyway!  So, what better way to cap off this year by being a few days late in wishing everyone Happy Holidays! :-)

Thank you to all THE GOODS and Stella followers this year.  And in the spirit of continuous improvement, let me get in an on time Happy New Year!

May 2012 be filled with love, health and happiness!  My New Years Resolution? Spend time with those you cherish and make a resolution to stick to the simple things in life, as they are always the best things in life!

Oh, and being a bit more regular with blogging - always a good thing :-)

See you in 2012!

12.20.2011

Easy Peasy Christmas Cookie #2


Polvorones - a great Mexican treat for Christmas!

Though these cookies are more commonly referred to as Mexican Wedding Cookies, I've found that they make a great addition to the Christmas cookie list! Polvo means powder in Spanish, which is exactly what these crumbly and buttery cookies turn into in your mouth. Yes...they actually melt-in-your-mouth!  With few and accessible ingredients, easy to prepare with a high level of enjoyment, these little bites of yumminess are on our list to bake this year!  Enjoy them with a nice cup of coffee, with their fragrant and nutty flavour, or be completely indulgent and add a couple to your next bowl of hot chocolate!

Thanks to the Food Network for this easy version.

Ingredients
  • 1 cup (2 sticks) unsalted butter, at room temperature
  • 1/2 cup sugar
  • 2 cups all-purpose flour
  • 1/2 cup ground walnuts
  • 1 cup chopped walnuts
  • 1/2 cup powdered sugar, plus more for serving

Directions

Using an electric mixer, beat the butter in a large bowl until light and fluffy. Add the sugar and beat until well blended. Beat in the flour, and then the ground and chopped walnuts. Divide the dough in half, forming each half into a ball. Wrap separately in plastic and chill until cold, about 30 minutes.

Preheat the oven to 325 degrees F.

Working with half of the chilled dough at a time while keeping the rest in the fridge, roll the dough by 2 teaspoonfuls between your palms into balls. Arrange the balls on a large baking sheet, spacing them 1/2-inch apart.

Bake the cookies until golden brown on the bottom and just pale golden on top, about 18 minutes. Cool the cookies for 5 minutes on the baking sheet. Toss the warm cookies in the powdered sugar. Transfer the sugar-coated cookies to a rack to cool completely. (The cookies can be prepared 2 days ahead. Store in an airtight container at room temperature). Sift additional powdered sugar over the cookies, if desired, before serving.

12.06.2011

Classic Cookies: Shortbread

About this time every year my interest peaks to find new or improved recipes for some fantastic cookies.  Maybe it's the enjoyment I get making cookies with my daughter (and she still enjoys it) or the calmness of being in the kitchen and creating - probably even more so than the season upon us - Christmas is great, but creating a cookie is awesome!

Reviewing my cookbooks reminded me of one of the core reasons I began to blog - to capture the best things I've encountered, house them in one place (instead of the pile of thousands of paper recipes) and to have something I can pass on to Jenna and share with friends, family and Internet searchers!  And in that spirit, I've decided to present a series of blogs that capture classic cookies with the most efficient and best recipes I have...to date!

So here is the most basic and one of my husband's favorite seasonal cookies - the mighty Shortbread.  Although my preference is something with chocolate, I have to admit, this is one of the most versatile cookies out there - how many ways can we create thee, let me count the ways....

Shape?  Whatever you like - from the most basic circle shape taken from a water glass imprint, to your favorite cookie cutter; wedges made from pressed shortbread in a pan, sticks/fingers, spirals and the list goes on.  To sugar, dip in chocolate or leave plain - these were once the only adaptations on the basic recipe.  Now, try any variation on flavour, from a french lavender, Mexican lime, Indian chai, seasonal cranberries, figs, apple cider to healthy green tea or matcha tea flavour.  I could go on, but for the sake of my poor typing skills and your patience, I'll stop here.

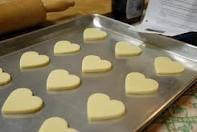
So, here is the recipe.  This week Jenna and I whipped up a batch of simple, heart shaped cookies sprinkled with sugar.  They are rich, buttery and oh so Christmasey!

Shortbread

Ingredients

1 cup, unsalted butter at room temperature
3/4 cup sugar
1 1/2 tsp. salt
2 1/3 cup flour
1/2 tsp vanilla, optional
Additional sugar for dusting, optional

Directions

Preheat oven to 350 degrees.

In a bowl with an electric mixer, cream together the butter and sugar until they are just combined.

Add the vanilla, salt and flour and mix on a low speed until the dough starts to come together.  Dump the dough on a floured surface and roll the dough into a disk shape.  Cover with saran wrap and chill in the fridge for 20 minutes.

Roll the dough to 1/2 inch thick and cut with any shape cutter.  Place the cookies on an ungreased sheet pan and sprinkle with sugar.  Bake for 20 minutes until the edges begin to brown.  Allow to cool to room temperature.

Enjoy!


11.29.2011

Muerte in Mexico, Part 2

So, the past trip to Mexico was more than just to observe the Day of the Dead - it was also a great excuse to see another area of Mexico that offered both the opportunity to spend time in a Colonial city, rich in history and culture AND indulge in a little R&R at the beach.

On arrival in Cancun, Hubby and I rented a car (crossed our fingers it would survive the journey, in tact) and headed on a four hour toll highway drive to Merida, capital of the Yucatan State.  Deemed the most boring drive in the world, by David, it was also a pretty expensive toll road with two pit stops that cost us about $38 to travel the highway, one way!  Why?  Probably because the Mayan Pyramids were also accessed by multiple tour buses everyday on this road - a great way to pay for the cost of this highway, over and over again!  Can anyone say cha-ching?

However, on arrival in Merida, we found some fantastic haciendas and their welcoming entrances, including this lovely hotel on Pasejo de Montego - Merida's take on a grand European main street.


Above is just one of many mansions built on this impressive street.  You can see one of two "unique" modes of transportation in Merida - a horse drawn buggy.  About 50% of the transportation seems to be either buggy or an original VW beetle!

Merida is one of the oldest cities in Mexico.  Once an area inhabited by the Mayans, the Spaniards, led by Francisco de Montego took over the area and built Merida.  In fact, the Spaniards dismantled many of the pyramids in this immediate area and used the stones to build structures for the new city.  One of the most well-known is located in the centro historico (historic centre) of Merida - the Cathedral San Idelfonso.  This Cathedral is the oldest on the American continent with a date of 1556.


The historic centre is where we hung our hat for a few days - walking up and down the narrow streets and impossibly narrow sidewalks, seeking out history, areas of interest, great cantinas, bistros and restaurants, quirky shops, including some fantastic chocolatiers and mostly, escaping the persistent rain storms!


Here's the remnants of a 30 minute rain storm - needless to say, both clothes and shoes were a bit worse for wear during this trip!

However, when the rain came, we gave in... Hello Cantina!
Order drinks, get free food!  What a great culture! Here's a shot at one local hangout - look down

Look up...What's not to like? :-)

Even rained out, there is always a way to enjoy cheap beer in Mexico!

The next shots are from the Governor's Palace, adjacent to the Cathedral in the Plaza Principal in Merida:


Two-story Colonial Palace

One of 24 murals painted by a single artist over his lifetime that depicts the journey of the Mayan people

Colonial door in the Palace next to another mural, just to give you an idea of the size of each mural!

After a few days in Merida, we headed to the coast, located on the Gulf of Mexico.  Progreso is a small fishing town of 55,000 people but with one odd addition: it is home to one of the largest piers in the world, spanning over 5 miles directly out to sea!  Why?  The Danish built this pier to help with importing/exporting to Mexico.  And of course, where there is a pier, cruise ships will come.  Cruise ships now have Progreso as a port of call several days a week.


And last, but certainly not least, the final days of our trip was spent in Cancun - an area new to both David and me - though we have flown into Cancun several times, this was our first taste of the area.  Very American in feel, it resembles a mature area of the States not unlike the Florida Keys, with lots of high end restaurants and shopping, but both a large lagoon and the ocean on either side.  The beach is probably the best in the entire area - makes sense, hotels typically find the best stretch of beach to place their property and Cancun was developed before the now hugely popular Riviera Maya.  If I had to make a choice, Cancun would be it!


11.23.2011

Muerte in Mexico, Part 1

Well, after all these years...we did it.  We finally committed to visiting one of Mexico's oldest cities, Merida (capital of the Yucatan, population 1 million), and just in time to celebrate the Day(s) of the Dead -  El Dia de los Muertos.

Regardless of a hurricane passing through Cancun, nothing could dampen my excitement to land, get a good nights rest and begin our four hour car journey to the city.  Although we experienced a literal dampening with four days of torrential rain, and the evening "Dead" celebrations completely rained out in the Plaza Principal (Main Plaza), we still managed to experience the food of the festival, the altars and the spirit of this celebration.  I've got to say, although my Irish heritage knows how to throw a great party after we bury our dead, it holds no candle to this yearly event and unique way of remembering love ones passed!  Hubby and I were so impressed by the way the Mexican culture admires and remembers their dead - with both reverence, humor, and some alcoholic beverages all rolled up into one!

Take a look at some altars:


Regardless of rained-out celebrations, we were pleased to find no shortage of altars around the city.  Every restaurant, bar, shop and hotel seemed to have their own altar dedicated to that special someone.

In fact, even the Walmart bakery was in the spirit!


Altars are decorated with several specific items like marigolds (the official flower of the dead) as well as sugar skulls and dead candles, both made and sold in the local markets.  But then, to make the altar unique for the individual being remembered, the living bring items the dead loved during their time on earth - this could be as simple as a CD of their favorite music, candied fruits, desserts or meals, cigarettes and even alcoholic beverages!  Every altar we saw was equipped with at least one specific brand of beer and usually with an accompanying bottle of tequila!  That's more like it!  To finish off the altar, there will be a picture of the deceased, so everyone knows who is being honored.

Why an altar?  Beyond the logical memorial, a few locals told us that the Mexican culture believes that the deceased come back to earth on these days and are present around their family and the altar.  It's believed the items on the table will be consumed and enjoyed by the deceased over the course of the celebration and then they retreat happy and full, until next year!  The family and friends of the deceased take part in activities once enjoyed by the deceased to honor and remember...

If you happen to be in a major colonial area of Mexico during this time and see a cemetery, pop in - you are likely to see families enjoying large picnics with their deceased and everything from games played to Mariachi bands playing - only, of course, if the deceased was a particular fan of Mariachi!

A few things of interest to note: Mexican culture and food varies per region, and this holiday comes with different customs and food for each area.  In the Yucatan, a highly Mayan area of Mexico, they celebrate with a national dish only cooked over the days around the celebration - typically October 29 - November 2nd.  So for these days only, you can sample the local Mucbil Pollo - a dish of chicken wrapped in a banana leaf which is cooked in the ground (pibil-style).  The chicken is reminiscent of a Mexican chicken pot pie and very hearty.  Another muerto special found in restaurants, family tables, hotels and bakeries alike is Pan de Muerto, or what Hubby likes to call, Dead Bread.  Yup, it's literally a special bread made for this holiday!  Picture an egg washed bread, in a round formation and over the top,  cross over two small lengths of dough in the shape of bones.  From the swankiest bakery to Walmart, everyone has their own version....


Our appetite was feed with both the experience of this celebration and the fantastic cultural food that came with it - from small bars, cantinas and roadside vendors, to bistros, cafes and restaurants, there was no shortage of experiencing everything we enjoy about Mexico.  If you are ever passing through, take notice of the skeletons around you and why this country is celebrating.  Not only is it a great learning experience but a fantastic take on how a different culture celebrates loved ones who have passed.

11.13.2011

Everything's Coming Up Roses

OK, well rose gold, that is!  If you haven't noticed, the Christmas retail season is in full gear - I know that because the entire population of Edmonton was coincidentally shopping in the same stores as me this weekend and yes, we now have two radio stations that are dedicated to 100% Christmas music until we wish in 2012, much to my husband's disapproval.

However, that also means the Stella and Dot Christmas capsule is out for all to love, adore and covet.  Although the capsule has several styles with varying metals, the major trend happening is the return of rose gold.  Don't worry about having to replace your white or yellow gold, this trend has been incorporated  with your favorite silver or yellow gold, stones or pearls.  I've taken some snapshots of the best of our rose gold collection, both new and not-so-new, to share with you:


Annablle - from the Christmas Capsule

Caroline - from the Christmas Capsule

Stunning Eternity band - wear it alone, or stacked with both white and yellow gold options

Goddess Drop Earrings - from the Christmas Capsule

Simple, but dazzling Soiree Stud in gold with rose crystals


Go ahead and take a look at the entire Fall 2011 line as well as the recently added Christmas Capsule (just click on the STELLA! tab in the navigation bar) - there is sure to be a few pieces that will make your sparkle and your season shine!

11.10.2011

Chocolate is always in style, always in season


No big surprise here - I love chocolate.  Chocolate bars, chocolate cake, chocolate cookies, chocolate bread, chocolate tarts, mole, and the list goes on.  I am always looking to experiment in the kitchen with new chocolate recipes, especially those that are easy to prepare and take little prep time! 

While surfing through a new cookbook and revisiting a favorite Laura Calder book, I came across the traditional flourless chocolate cake.  I've been quite hesitant to plow into a recipse that deal with lots of air-incorporation, egg whites and folding - no bad past experience, just too much reality TV disasters, courtesy of the Food Network!  So with extra chocolate, a carton of eggs, whisk and multiple recipes staring me down, I decided it was time - either chocolate heaven or a train wreck awaited me.  It worked.  It worked so well, I ate almost half the cake.  Is that wrong?  But here's the bonus - not only is this cake nice and crisp on the top and exceptionally fudgy and moist on the inside, it is EASY to make!  Give it a try - you won't regret it!  Oh yeah, and the imperfect top of the cake, cracks, etc - do not be alarmed, it only adds to the character of this masterpiece!  No wonder Laura Calder fondly calls it Craggy Cake!  I finished mine off with a simple dusting of icing sugar - no fancy decoration needed for this one!


Flourless Chocolate Cake

Ingredients

  • 6 tablespoons unsalted butter, plus more for pan
  • 8 ounces bittersweet or semisweet chocolate, finely chopped
  • 6 large eggs, separated
  • 1/2 cup granulated sugar
  • Confectioners' sugar, for dusting
  • Sweetened whipped cream, for serving

Directions

  1. Preheat the oven to 275 degrees with the rack in the center. Butter the bottom and sides of a 9-inch springform pan. Set aside.
  2. Place butter and chocolate in a large heatproof bowl and microwave in 30-second increments, stirring each time, until completely melted. Let cool slightly. Whisk in egg yolks.
  3. In a large bowl, beat egg whites until soft peaks form. Gradually add granulated sugar, and continue beating until glossy stiff peaks form. Whisk 1/4 of the egg whites into the chocolate mixture; then gently fold in remaining egg whites.
  4. Pour batter into the prepared pan, and smooth the top with a rubber spatula. Bake until the cake pulls away from the sides of the pan and is set in the center, 45 to 50 minutes. Cool completely on a wire rack; remove sides of pan. Serve at room temperature, dusted with confectioners' sugar. Serve with whipped cream, if desired.

    Here is the prettiest version I could find: wedge standing upright, probably in a bath of creme anglaise with a few drops of chocolate sauce!


Powered by Blogger.