12.13.2012

Something French

Continuing with my heritage theme for Christmas cookie recipes, I thought it would be a nice idea to record a recipe for my daughter that represents her French background.  As a child, she was always taken with fudge, and particularly her Grandfather's Quebec classic: Sucre a la Creme.  I recently saw a Food network Christmas special that highlighted Quebec traditions and low and behold, there was the "fudge" she loved so much!  Jenna's version is plain, sometimes with walnuts or maple syrup, but this is a great jumping point for so many varieties!

So, here's hoping Jenna enjoys making this fudge as much as she does eating it!  And hopefully, she'll continue this tradition for many, many years!


Sucre a la Creme (with Maldon salt and pecans)

Ingredients

  • Oil, for greasing pan
  • 1 1/2 cups/375 ml brown sugar
  • 1 cup/250 ml 35-percent cream
  • 1/2 cup/125 ml sugar
  • 1/2 cup/125 ml maple syrup
  • 1 tablespoon/15 ml butter
  • Pinch
salt
  • 1/2 teaspoon/2 ml vanilla extract
  • 1/2 cup/125 ml pecans, toasted and roughly chopped, for garnish
  • Maldon salt, for garnish
  • Directions

    Line an 8-inch (20-cm) square pan with plastic wrap and lightly oil. 
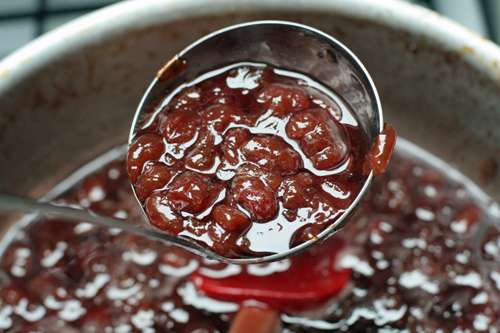
In a saucepan, combine the brown sugar, cream, sugar, maple syrup, butter and salt and bring to a boil, stirring with a wooden spoon to dissolve the sugar. Attach a candy thermometer in the center of the pan and simmer over medium heat without stirring until the thermometer reads 237 degrees F (114 degrees C). Add the vanilla extract without stirring. Place the pan in a cold water bath. Cool, without stirring, until the thermometer reads 113 degrees F (45 degrees C), about 20 minutes. 
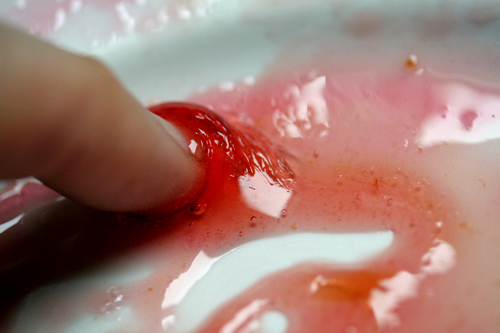
Remove the pan from the water bath. Using an electric mixer or a wooden spoon, stir vigorously until the mixture begins to lighten in color and become creamy, 2 to 3 minutes. Please note that if you whip too much, the sugar and cream mixture will harden before you have time to pour it into the pan. Pour immediately into the prepared pan and smooth with a spatula. Garnish with crushed toasted pecans and Maldon salt. Cover with plastic wrap. Let cool for about 1 hour at room temperature or 30 minutes in the refrigerator. Remove from the pan and remove from the plastic wrap. Cut into squares. Store in an airtight container.

    12.12.2012

    Looking back to Christmas

    Every year, albeit usually a bit earlier than this, I always get in the mood to experiment with new cookies for the Christmas season.  Whether to have on hand for guests, the all-too-often time my daughter and I kick back with some hot chocolate, quick hostess gifts or whatever event comes up, cookies in the freezer are a good thing.

    This year, I've been thinking alot about my grandmother, who could whip up a batch of cookies before her morning tea and single-handedly supply the local bakery with fresh bread before her second cup of tea.  I have fond memories of afternoons in her apartment being apart of this cooking frenzy.  But frenzy had nothing to do with it, it was a typical day which happened several times a week for her.  The best part was waiting for my Father to pick me up after work and see how pleased he was to leave with cookies, many loaves of bread and maybe a kid! :-)  These thoughts, of course, led to a search for these recipes and recreating them with my own daughter this Christmas.   (Unfortunately, my one regret was not collecting her recipes before she passed away.)  I still remember a simple drop cookie she made which was my absolute favorite - blonde in colour, raisins and I think, an assortment of spices.  For years I searched thousands of recipes, just to come up empty.

    This year, with the power of Facebook, I came across a blog of Newfoundland recipes - NL Rock Recipes and low and behold, a plethora of old fashioned Newfoundland cookie recipes!  One of my Nan's favorites were snowballs - it was a mixture of marshmallows with a fudgy surround, rolled in a ball and through coconut.  However, I didn't realize until lately what battles arise across the province over what is a "snowball" cookie - some say it's just the fudgy chocolate base rolled in coconut, others say it's marshmallows.  Either works for us!

    So I decided to start this brief series of Christmas cooking with a nod to my heritage, a fond look back at my childhood and remembering my dear Nan who accepted me so easily as her Sous Chef.  Thanks, Nan.  Jenna is going to love these cookies!

    From www.nlrockrecipes.com

    Snowballs

    Key to the success of this recipe is the length of time that the base of the recipe is boiled. More precisely, it is the temperature that the mixture reaches when boiling that is critical. Much akin to making fudge, you are looking for the mixture to reach soft ball stage or near soft ball stage on a candy thermometer. Use one if you have it but if not, the five minutes gentle boiling as directed in the recipe is a pretty dependable guideline. It is also very important not to stir the mixture as it boils or you risk the sugar crystallizing and leaving you with a hard, crumbly finished product.

    In a large saucepan, combine and boil together gently over medium high heat for 5 minutes or until mixture reaches about 230 degrees F on a candy thermometer:
    3 cups sugar
    3/4 cup melted butter
    1 1/4 cups milk

    Once mixture begins to boil it is very important not to stir it at all.

    Mix together:

    3 cups large rolled oats
    1 cup unsweetened fine coconut
    12 tbsp cocoa

    Add the boiled mixture to the dry ingredients until well combined and chill well. until mixture is able to be shaped into 1 1/2 inch balls. Roll the balls in additional coconut. Makes about 4 dozen. These should be stored in the fridge. These freeze very well (my kids eat them frozen all the time, just like my siblings and I did as kids)

    11.14.2012

    What's in your Houzz?


    In the middle of my husband's first renovation at our house.  This renovation should not come as a surprise, as we've been avidly collecting power tools for him over the past year and a half, but the actual removal of our shower was, well let's say, a bit shocking.  For David, it's not his first renovation ever, but for many, many years and the first one with me.  For me - well, it's the first time I've seen something ripped off the wall and sawed into movable pieces.  Reason: Hubby wants a bigger shower, and gosh darn it, a nicer one.  Response: go for it!  There is only a few downsides: my inability to make up my mind and in a surge to make the most cost efficient decision, never seem to make the most satisfying choice, and two, the budget.  Thankfully, this is hubby's project, his sweat and full on launch into projects during retirement!  I am merely the designer and assistant.

    So, currently, the shower is the focus - everything else remains intact until that is resolved.  Shower has been removed, shower is now enlarged and being tiled.  Shower heads and decision to go with travertine - done.  Frustration working with travertine - a real and present danger.  Shower doors to be ordered.  Kathryn comes across awesome website to help plan renovations and decorating - damn!  Why do these things happen out of sync for me?

    www.houzz.com

    Get on it!  A fantastic new website with oodles and oodles of pictures, descriptions, shopping tags, Q&As from designers and enthusiasts alike.  Similar to Pinterest, you can create labelled ideabooks and store all the photos that resonate with you, plus give descriptors of what it is about the visuals that inspire you.  Love the color paint, the vanity or want to know where you can get that fabulous rug?  Look no further: many of the designers have listed a product sheet or simply ask the question.  Genius.  Now, if only I had run across this website in September.  Oh well, I know where to go for the next renovation project!

    11.12.2012

    Awesome brownies, anyone?

    Not just brownies, but freakin' awesome ones.  In fact, I probably have about forty different brownie recipes - a conservative estimate - but after a few "not so perfect" choices, I prompt gave up, whipped up a batch of cookies and never really made it back to find that perfect brownie.  You know, the one that has a slightly flaky/crunchy top but almost fudge and all spectacular chocolate inside.  Yeah, that one.

    That was until this past month.  My daughter was longing for a trip to the Duchess for her favorite brownie when the urge took us both over to just make the damn things and make them now.  We started searching the reliables: Ina Garten, Martha Stewart, Laura Calder and then the classics.  What we came up with was a selection of recipes that were marginally different, based on your own preferences: all chocolate, dark or milk chocolate, pecans, walnuts, chocolate chips?  We settled on our brownie primarily being the good old fashioned fudgy chocolate and a sprinkle of pecans for an extra crunch. 

    Note: the biggest problem is waiting for the darn things to cool.  Jenna ate a 1/3 of the batch before the hour cooling was complete... Don't worry - it's a good thing :-)

    Jenna's Fudgy Brownies

    Ingredients:
    1/2 cup unsalted butter, plus more for foil
    8 oz. good quality, semi-sweet chocolate, coarsely chopped
    1 1/4 cup sugar
    3/4 tsp. salt
    3 large eggs
    3/4 cup flour
    Optional:
    nuts: 3/4 cup walnuts or pecans, milk, dark or white chocolate chunks

    Directions:

    Preheat oven to 350.  Line an 8-inch pan with foil (leaving overhang on two sides); butter or spray the foil.

    Place the butter and chocolate in  a medium heatproof bowl and set over a saucepan of simmering water.  Heat until the butter and chocolate are melted; stir.

    Whisk sugar, then salt into the chocolate mixture; whisk in eggs and then gently whisk in flour just until the batter is combined.  Do not over mix.  Fold in any additions you might want.

    Spread the batter into your foil-lined pan and bake for 45 minutes.  A toothpick should come out almost clean - just a few crumbs attached.  Remove from the heat and let the brownies cool completely.

    Lift the foil (and brownies) out of the pan and peel the foil from the brownies.  Cut into pieces and enjoy!


    11.05.2012

    Trunk Show = Desserts


    Seems like a no-brainer.  Mix guests with Stella and Dot Trunk Show and what do you get?  Desserts.  Take it up a notch over the official holiday season and you get magical bling + friends = french desserts. I now remember why it's such a dangerous time of the year for my waistline, but alas, I carry on - there is no room for quitters in a kitchen.

    Tonight is my first of two Holiday shows for my customers, as of course, one night does not fit every one's schedule, and to be honest, I couldn't possibly fit all these desserts I need to make into one night!  On the menu this evening is a simple but deadly lemon tart, walnut cake, some dipped strawberries and my interpretation to date of a hummingbird cake.  Now, I am still in the test kitchen figuring out the right measures, but the once indulged treat at Duchess proved to be a beautiful balance of banana bread with coconut and pineapple.  Stay tuned if I ever finish this recipe enough to blog it.  However, while you wait, I can share with you my fail proof recipe for Cream Cheese icing, which, happens to be the perfect topping for the fore mentioned hummingbird.

    This is a recipe from Ina Garten, however, I tend to let the kitchen aid work at the final incorporation and slightly whip the icing - I'm a sucker for a lighter, meringue style topping...

    Cream Cheese Frosting:

    • 6 ounces cream cheese, at room temperature
    • 6 tablespoons (3/4 stick) unsalted butter, at room temperature
    • 1 teaspoon pure vanilla extract
    • 2 1/2 cups sifted confectioners' sugar (1/2 pound)
    Mix the cream cheese, butter, and vanilla in the bowl of an electric mixer fitted with the paddle attachment on low speed until just combined. Don't whip! Add the sugar and mix until smooth. Yield: frosting for one 9-inch cake.

    Holiday Time!

    I know, the first week of November is a bit early to mention the upcoming season, but tonight, I have my first of two Holiday Trunk Shows and I am sooooo excited to share with everyone the great new look of Stella and Dot!  Not only can you assume some fabulous pieces of bling are in the mix, but with that, comes a collaboration with Alice Temperley - very popular British fashion designer, the launch into a scarf collection, beautiful candles and in addition to the purse line - wallets and tech wallets - a wallet just large enough for your iPhone, money and cards.  In one word: brilliant!

    Here is a peek of some of the great items in store for all those Stella shoppers, new and old!


    9.18.2012

    Great new retail gathering!

    It's been awhile since I've been on Edmonton's infamous Whyte Avenue.  I can't remember the last time I visited a pub, restaurant or ambled down the blocks of local shopping boutiques and artsy cafes.  I miss that.  However, with the increase in popularity comes the expected: no parking, crowds and police.  I miss that less. 

    A dear friend of mine recommended an acupuncturist/herbalist specialist to me a few months back, the only downside - located on Whyte Avenue.  However, my want to see this much talked about sanctuary and of course, receive great wellness care quickly overcome the glitch of nightmare traffic about two months ago.  I was impressed.  Located in a new building named Roots on Whyte, this community-based building, newly constructed on Whyte Avenue (with cheap underground parking) and even more to offer than a fantastic wellness retreat!  Located within three stories is a variety of local wellness businesses from chiropractor, dentist, yoga studio, therapist, hair salon to pilates studio.  On the main level, you'll find Blush Organic Market, deCapo Italian coffee bar and a quaint and quirky noshery Under the High Wheel - with beautiful plates of seasonal food lovingly prepared for you.


    This is heaven.  Grab a coffee, get your shopping done, have a bite to eat and then off to the main event: Wellness on Whyte, for some loving care.  Add a pilates session in and that, my friend, is the definition of a morning well spent!


    If you are seeking some loving care, I'd highly suggest Wellness on Whyte. (www.wellnessonwhyte.com ) The owner, Geha Gonthier, is a fabulous and knowledgeable professional who offers only the best in her sanctuary to help ease the mind, body and soul.  Geha is now, my acupuncturist, and I am all the more wiser for adding her Eastern medicine practises into my overall wellness routine.  Geha also has some other fantastic professionals on staff, including my daughter's new best friend - massage therapist, Leslie.  Leslie has both Jenna and me under her care and is a wonderfully caring individual with great technique and personality.  I hear Geha has also added a traditionally trained European facialist to the roster.  Hmmmmm...I sense another visit very shortly!

    All in all, it's worth the traffic and drive to experience better well being through Wellness on Whyte as well as all the other fabulous storefronts at Roots on Whyte.  With ample parking and central location, this should be your next favorite place to spend an hour or three!

    8.15.2012

    Happy Birthday!


    Happy Birthday, Julia!  If she was alive today, Jooooolia would be celebrating her 100th birthday, no doubt with a great meal which included butter and cream, wine, good friends and smart conversation!

    I love this lady, and I must admit, I miss her presence in the ever expanding world of food.  One of the many female models of my youth, I loved Julia Child for her strong personality and character.  Her ability to say what was on her mind, her success in following her passion and her advice on moderation.  I'm still working on the moderation bit, Jools.

    7.31.2012

    Too much fruit?


    That's a complaint you will NEVER hear at our house, or at least, never admit too.  We love gardening, we love the summer and we love our harvest.  And, for the first time, our cherry tree is giving off a bumper crop, however, a bit on the *pucker* tart side.  So... no freakin way my husband, daughter and I will be chowing down on these things raw.  And time is not on my side - ripe today, on the ground tomorrow, so with bowl of cherries in hand, I marched off to the kitchen to do what anyone would: insert cherries in pot and add heat.  Jam.  Or Jelly.  Heck, why not compote.  I figured the consistency would determine the title, because it has to have a name - especially when Hubby walks in and asks why I'm cooking when it's 30 degrees outside! 


    A little bit of sugar, some lemon peel and a squirt of lemon and then.....off to the trusty Ipad to make sure I wasn't missing any key ingredients - it was my first go at cherry something.  And when I came across David Lebovitz's No Recipe Cherry Jam recipe, a sigh of relief.  It's all good, it tastes fantastic and I have a piece of toast just screaming for a partner.  Hubby's thumbs up, a good sized bowl of cherry  ____, and I'm the Jamish Queen for the next week.  Life is good.  Life is slightly better with an abundance of fresh fruit.  Life is awesome with a happy family and a bowl full of preserve.  Enjoy!

    David Lebovitz's No Recipe Cherry Jam

     
    1. Buy as many cherries as you feel like pitting.
    Usually I have the patience for about 3 pounds, but it’s up to you. Figure one pound of cherries will make one good-sized jar of jam. Plump, dark Bing cherries work really well, although Burlats are good, and if you can find sour cherries, your jam will rock.
    2. Wear something red. Rinse the cherries and remove the stems. Using the handy cherry pitter that I told you to buy a few weeks ago, pit the cherries. Make sure to remove all the pits. Chop about 3/4ths of them into smaller pieces, but not too small. Leave some cherries whole so people can see later on how hard you worked pitting real cherries. If you leave too many whole ones, they’ll tumble off your toast.
    3. Cook the cherries in a large non-reactive stockpot. It should be pretty big since the juices bubble up. Add the zest and juice of one or two fresh lemons. Lemon juice adds pectin as well as acidity, and will help the jam gel later on.
    4. Cook the cherries, stirring once in a while with a heatproof spatula, until they’re wilted and completely soft, which may take about 20 minutes, depending on how much heat you give them. Aren’t they beautiful, all juicy and red?
    cherry jam
    5. Once they’re cooked, measure out how many cherries you have (including the juice.) Use 3/4 of the amount of sugar. For example if you have 4 cups of cooked cherry matter, add 3 cups of sugar. It may seem like a lot, but that amount of sugar is necessary to keep the jam from spoilage.
    6. Stir the sugar and the cherries in the pot and cook over moderate-to-high heat. The best jam is cooked quickly. While it’s cooking, put a small white plate in the freezer. Remain vigilant and stir the fruit often with a heatproof utensil. (Wouldn’t it be a shame to burn it at this point?) Scrape the bottom of the pot as you stir as well.
    7. Once the bubbles subside and the jam appears a bit thick and looks like it is beginning to gel, (it will coat the spatula in a clear, thick-ish, jelly-like layer, but not too thick) turn off the heat and put a small amount of jam on the frozen plate and return to the freezer. After a few minutes, when you nudge it if it wrinkles, it’s done.
    wrinkle test
    If not, cook it some more, turn off the heat, and test it again. If you overcook your jam, the sugar will caramelize and it won’t taste good and there’s nothing you can do. Better to undercook it, test it, then cook it some more.
    Once it’s done and gelled, add a bit of kirsch if you have it, clear cherry eau-de-vie which will highlight the flavor. Or add a few drops of almond extract, but not too much, or it will taste like a cheap Italian cake. Ladle the warm jam into clean jars and cover. Cool at room temperature, then put in the refrigerator where it will keep for several months.

    7.09.2012

    Fall already?

    I know, we just started the first heatwave of the summer and already, Fall is in the air - or at least in the magazines, on the Internet and of course, sprouting up everywhere for Stella and Dot.  Yup, the much anticipated Fall 2012 collection was released on the weekend.  And although that means we retire some classic design pieces, it means a cheerful hello to some spectacular new ones!

    Themes for this collection include a new and updated charm collection, Mod Safari (think bright colors, oh so hot animal print trend and a nod to the 60s) and the New Romantics collection, inspired from Alexander McQueen's collection of masterpieces, Victorian estate jewellery and mixed metals.  One thing is for sure, Stella and Dot is always on trend, seems to get better and more intricate in it's design as the collections progress and is wearable for any age! 

    Check out a few pieces:


    Like to browse the entire collection?  Simply click on the STELLA! link in the navigation bar :-)

    6.24.2012

    What to do with all those radishes

    Several years ago when my husband and I started our first vegetable garden, radishes where on the first list of potential vegetables, every list of food to grow and of course, the shopping list for the above said garden.  Why?  It's the ultimate test: if you can't grow radishes, well.... get used to spending time at the Farmers Market for those fresh veg!  With a maturity date of around 1 month, you can simply plant radishes from seed straight to your soil, water and watch them grow.  And there are many varieties of radishes: different colours, shapes and variations on flavour that make such a beautiful picture when you pull those puppies out of the ground.  I have to admit, though, I've never been a fan of this lovely-looking vegetable.  The taste.  Blah.  But every year we plant, every year we harvest and every year my husband adds a few to his salad and stores the rest in the fridge.  Seems a shame, don't you think?


    So this year, I decided to give the hearty radish another look and taste.  We have three variations this year: the traditional red bulb (red globe), a white and red long bulb (french breakfast) and a white version (icicle) that looks more like a carrot than anything else!  The questions then remains: what do I do with this harvest?  Coincidence or not, we found ourselves in NYC in May and on my list of places to nosh, was the Spanish gastropub, Tertulia.  With great reviews and a nice tapas menu, we were bound to have a great meal.  On the list was a radish salad - paired with baby market carrots and an anchovy vinaigrette.  OK, two strikes on this one: the radish and the anchovy.  But hey, when in NYC, you try something new.  I loved it!  What a great re-introduction to this little vegetable.  Now, to recreate the salad when on home turf... On return to Edmonton and when firmly seated in front of my computer, there seemed to be no shortage of mention of this salad, from Martha"s (Stewart) Blog as well as GP's Goop!


    I found a recipe from the New York Times for the anchovy vinaigrette and basically harvested a variety of our radishes as well as some baby and organic carrots, added a little sweet onion and herbs. 

    Anchovy Vinaigrette

    Ingredients

    • 1/2 cup extra virgin olive oil
    • 3 tablespoons or more good red or white wine vinegar
    • Salt and fresh-ground black pepper to taste
    • 1 heaping teaspoon Dijon mustard, optional
    • 3 anchovy fillets, or more to taste, with some of their oil
    • 1 large shallot (about 1 ounce), peeled and cut into chunks

    Preparation

    1.
    Combine all ingredients except shallot in a blender, and turn the machine on. A creamy emulsion will form within 30 seconds. Taste, and add more vinegar if necessary, about a teaspoon at a time, until the balance tastes right.
    2.
    Add shallot, and turn machine on and off a few times, until shallot is minced within the dressing. Taste, adjust seasoning and serve. (This vinaigrette is best made fresh but will keep refrigerated for a few days. Before using, bring it back to room temperature, and whisk briefly.)


    Health fact of the lovely radish:  radishes provide several vitamins including Vitamin C, K, B6 and folic acid!

    Other food combinations I found for radishes:

    • Strawberry and radish salad with balsamic vinegar
    • Panzanella salad with radishes
    • Roasted radishes, with or without other root vegetables
    • Escabeche of shrimp, mango and radish
    Whatever your preference, if you are a new gardener or one in need of almost instant gratification, the radish is a simple and hearty vegetable to grow for your summer table.  And for those that thought the radish belongs only in Asian cooking or tossed in as an after thought with your salad, think again!  Boiled, steamed, roasted or eaten raw, this vegetable is worth another go on your plate!


    6.15.2012

    Best Olive Oil in Town?

    For the past week, my husband, daughter and dog have been hosting some dear friends from England.  First time in Canada and of course, first time in Edmonton.  Where to start the tour on a Saturday in June?  Why the downtown Farmer's Market, of course! 

    It's been a while since my last toodle through the 104 Street area of town, and you know, it never fails.  What's not to like about a few wine bars, coffeehouses, a great french bistro, diner, etc alongside a festival, parade and the local market.  In fact, it was a bit of an assault of the senses.  But through the crowds, I did notice a new storefront.  New to me, as I have to admit, I'm not sure how long it's been opened.  Nonetheless, it's a find that I can strike off my list as this store sells...Olive oil!  Yes, I'm as shocked as you!  A store completely dedicated to vats of olive oil from around the world (OK, vinegars and some other specialty items as well) and in Edmonton.  In a city where I have always struggled finding a nice olive oil to suit our meals, it's a breath of fresh air.  And to my delight, a tasting store - YES!  Edmonton, meet Evoolution.  Evoolution - thank you for coming!

    Take a look at their beautiful interior...


    Label for each olive oil


    This is what I love about Edmonton: as northern a city and as more of a town feel than an urban metropolis, you can find gems that bring the world to you.  Would you believe I found an olive oil David and I tasted on one of our trips to the Sonoma/Napa region?  And such a beautiful store as well - I love the industrial stainless steel vats mixed with the warm wood.  Very Californian, very foodie and very welcoming.  Staff are readily available to walk you through the complexities of choosing an olive oil and happy to educate customers while they taste the wares.  This is my kind of store!  It's hard not to like a place where you can shop, eat and learn all at once.  Well, for me, it's ideal and it's on the list for next week!


    Powered by Blogger.