10.23.2011

My Favorite New Ingredient

Since uncovering my allergies to milk, whey protein and soy, I've been in the "test kitchen"  trying to find alternatives worthy of keeping my appliances turned on.  I'm an avid baker and have the best sweet tooth I know, so it was devastating to think my options were giving up the heavenly indulgences found in every bakeshop or worse still, left with an alternative void of the good stuff and reselmbling, well....a football.

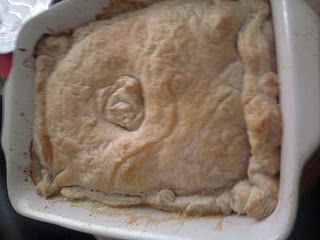
I've had some ugly results, some clear misses, but thankfully, a few good products emerged from my experiments as keepers in my pantry.  The best by far, is almond milk.  Yup, tastes good and is even better in baked goods or wherever you use milk/cream in baking or cooking.  I've used almond milk in cookies, cakes and brownies as much as I've used it in Chicken Pot Pie and even soups!  The richness of this milk leaves you feeling that you've indulged, and the nutty flavour is a great addition to most recipes.  Also easily substituted in your favorite hot breakfast cereal or coffee of choice.


Almond milk is now readily available in all grocery stores, from organic grocers, health stores to food chains and even Walmart!  While it comes in original, vanilla and chocolate, I try to by the unsweetened versions, coming in at only 40 calories for one cup (250ml) and containing a huge amount of vitamins, minerals and one third of your daily calcium.  What's not to like?


My favorite (so far) is Blue Diamond's Unsweetened Almond Breeze - I use the original for all my baking and often buy the vanilla for cakes, smoothies and coffees.

Besides almond milk providing an option for those adverse to milk products, it's also really good for you!  I've noticed in one month of it in my diet that my skin has improved - both in texture and fighting off imperfections, of which there are many!  This milk is also rich in protein, omega fatty acids, low in sodium and void of saturated fats - the list goes on!

You can even make your own at home by adding 1 cup of almonds to a food processor or blender, then add 1/2 teaspoon of vanilla, 2 full glasses of water add 1/2 teaspoon of honey and blend it up. Fresh homemade almond milk is probably the healthiest way to go, but I just haven't found the time yet to give it a try!

10.22.2011

Chicken Pot Pie Recipe

As promised, here Jamie Oliver's recipe for Chicken Pot Pie.  Since we are not big mushroom fans, David substituted with a mix of carrots and peas, while the creme fraiche (or cream) was substituted with almond milk - we doubled the volume.  I would also experiment with different kinds of onions in addition or replacement of the scallions, try shallots or leeks!

Hope you enjoy!

Chicken Pot Pie

Ingredients

4 x 6-ounce skinless chicken breasts
Olive oil
A pat of butter
A bunch of scallions
6 ounces button mushrooms
1 heaping Tbsp all-purpose flour, plus extra for dusting
2 tsp. English mustard
1 generous tablespoon creme fraiche or heavy cream
1 1/4 cup organic chicken stock
A few sprigs of fresh thyme
1/3 nutmeg, grated or 1/4 tsp. ground nutmeg, to taste
1 large sheet frozen puff pastry, thawed
1 egg

Directions

Set the oven to 400F.

Put the chicken breasts on a plastic board and slice into 1/2 inch strips.  Put a lug of olive oil and a pat of butter into a hot, large, wide pan.  Add the chicken and cook for three minutes.  Meanwhile, quickly trim the scallions and wash the mushrooms, then slice in a food processor (or by hand).

Add the vegetables to the pan with one heaping tablespoon of flour and stir.  Add the mustard, creme fraiche and chicken stock - stir well.  Pick the thyme leaves and stir into the pan with a few fine gratings of nutmeg and a good pinch of salt and pepper.  Leave to simmer.

Lightly dust a clean surface with flour and unroll the sheet of pastry -  if needed, roll out the pastry to fit over a 9 x 13 inch pan (probably 10 x 14 inch square).  Use a small knife to lightly crisscross and score the pastry.

Take the pan of chicken off the heat and transfer it to a baking dish slightly smaller than the pastry, tucking it in at the edges.  Quickly beat the egg and brush it over the top of the pie. Put into the oven and cook for 15 - 20 minutes, until the crust is brown and flaky.

10.12.2011

Easy Peasy Comfy Food: Chicken Pie


In the early days of retirement, my husband has decided to take up cooking.  Once a week he searches through cookbooks or watches some food tv program to get inspiration for a mid-week meal.  His rules: once during the work week, a new recipe and never the same recipe twice.  His rules, not mine!

So, for my birthday Mr. Wonderful decided to make a Jamie Oliver chicken pot pie - it's the perfect definition of a fall comfort food on a cold day, with thick chunks of chicken mixed with vegetables and a smooth creamy sauce.  David's version of this recipe though, has a few adjustments to save the waistline and keep in mind my allergies.  It was a gamble, but turned out fantastic.  And sorry love, Chicken Pot Pie will be repeated in our house many times before Spring arrives again!

The recipe can be found in Jamie Oliver's latest cookbook, Thirty Minute Meals (if your Jamie Oliver, yes.  If not, a titch longer).  I thought I would share this you tube link, as it walks through the ease of the recipe, and I will follow up with the written recipe.  As an aside, we substituted the creme fraiche/cream with a double portion of almond milk.  And as we are not huge fans of mushrooms, my husband substituted peas and carrots.  I'd experiment with additional veggies - variety goes a long way during the winter months!

Enjoy!

http://www.youtube.com/watch?v=h_VNuW23lD8

10.03.2011

Preserve those herbs!

For the gardener  or the foodie that decided to get inspired and plant some herbs this summer, it's now time to figure out what to do with those beautiful smelling bushes.  Gone are the winters that I would curse buying half dead "fresh" herbs at the local grocery store, simply because I have learned the not-so fine art of preserving.  Whether to dry or to freeze is your preference, your bountiful harvest can keep each meal at the peak of perfection throughout our cold, long winter.


There are many different ways to preserve herbs: hang them to dry, freeze them, mix with oil to freeze or develop your own collection of scented oils; don't forget the humble looking, but out of this world flavour of the simple compound butter: simply mix your favourite herbs with butter, place in a sheet of parchment or cling wrap, form into a log and freeze.  Then, just cut off rounds as you need them throughout the year.


Last year I tried drying herbs - it's fine, but with the quantity I'd like to preserve this fall, I doubt I have enough hanging space in my home that won't drive hubby crazy.  So, this year, I am opting to dry freeze my herbs.  This entails a good wash with cold water, spin them to dry in a salad spinner, place them in a ziploc and throw them into the freezer.  Forget about them and about a week later, you should have herbs that are frozen with the leaves fallen away from the stems.  Then, simply place the leaves in a canning jar or other container, label and place in the freezer for winter consumption.


But first, a few quick notes: herbs can mostly be divided into two categories: hard and soft.  Rosemary, thyme and sage I categorize as hard, as they lend themselves to longer cooking times.  Mint, basil and parsley, on the other hand, are soft herbs that tend to perform best when added to food in the final few minutes of cooking.  After some Internet research, I found a preserving trend: hard herbs fare well to dry freezing, while soft herbs worked well freezing with an oil or butter. (think pesto frozen in ice cube trays)

It's your preference with how you maintain your herbs, but why not enjoy the fruits of your summer labor long into the winter months?  When nothing is growing outside, I feel satisfied that I can still enjoy a fantastically flavored meal that has some origin from our backyard.

Powered by Blogger.